1. Function Introduction
This article explains how to obtain the API for a Coze Global (coze.com) bot. Once obtained, fill it in under [App Store - Coze (Global)].
2. Operation Process
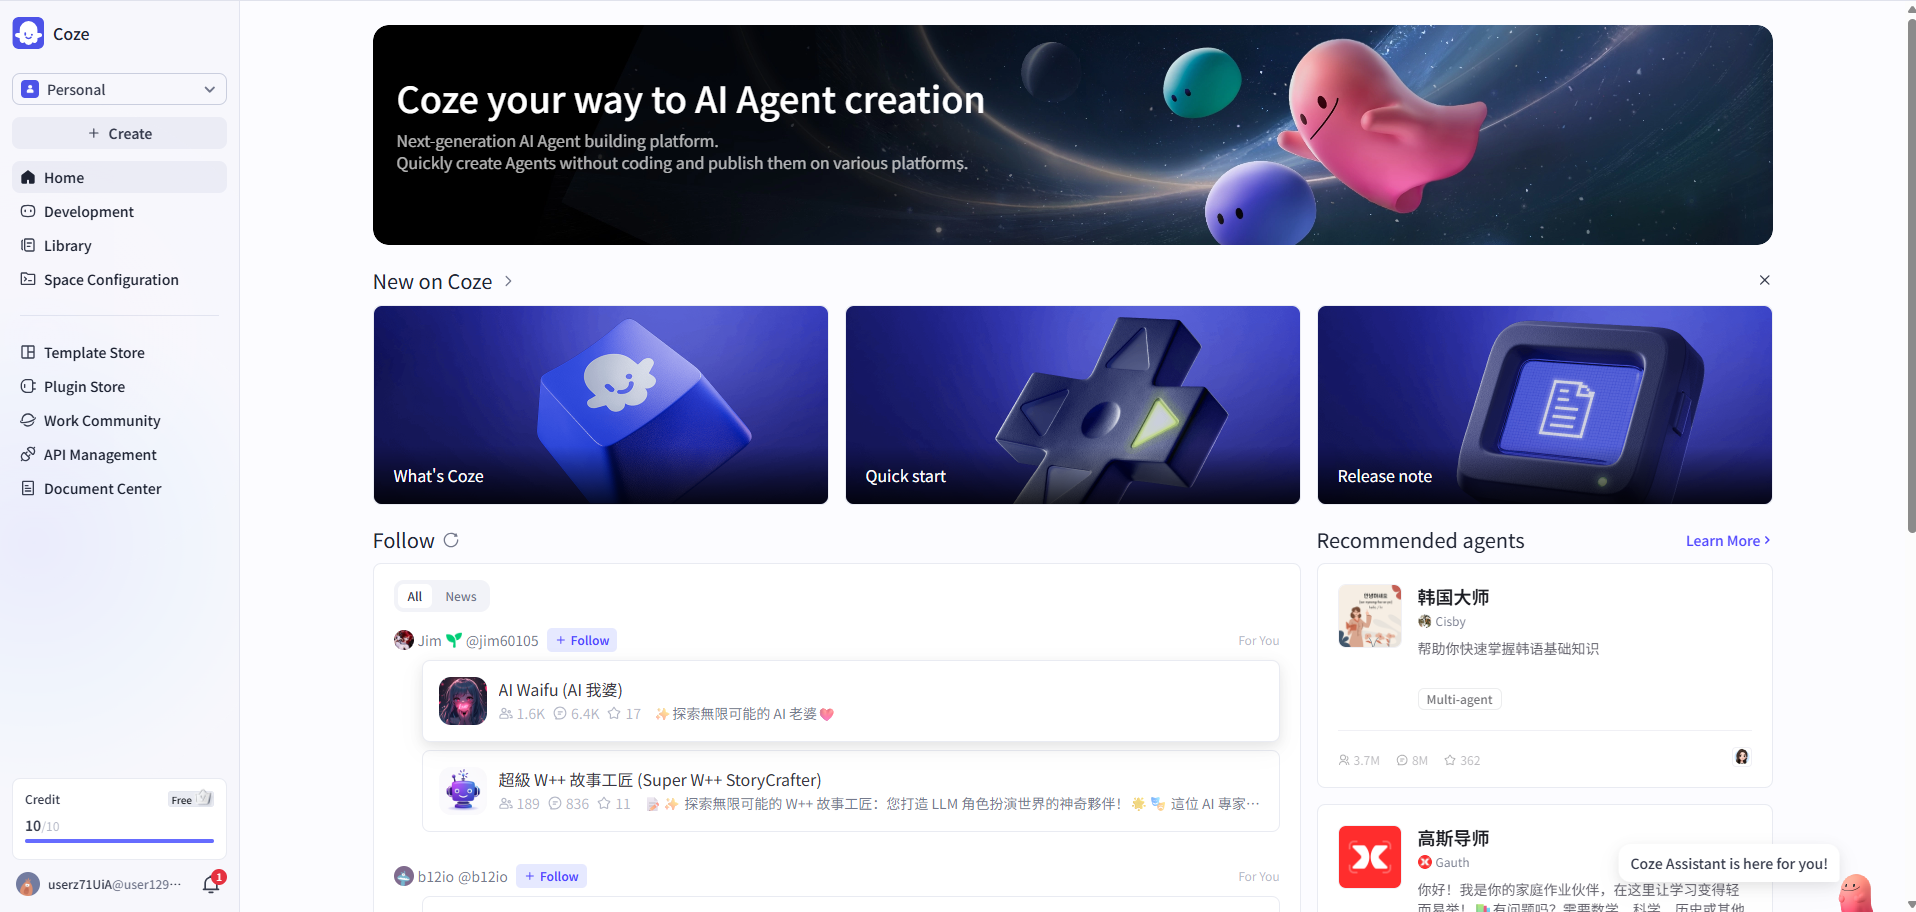
2.1 Open the Coze Global homepage
Go to https://www.coze.com and sign in with your international account.
2.2 Create an OAuth App
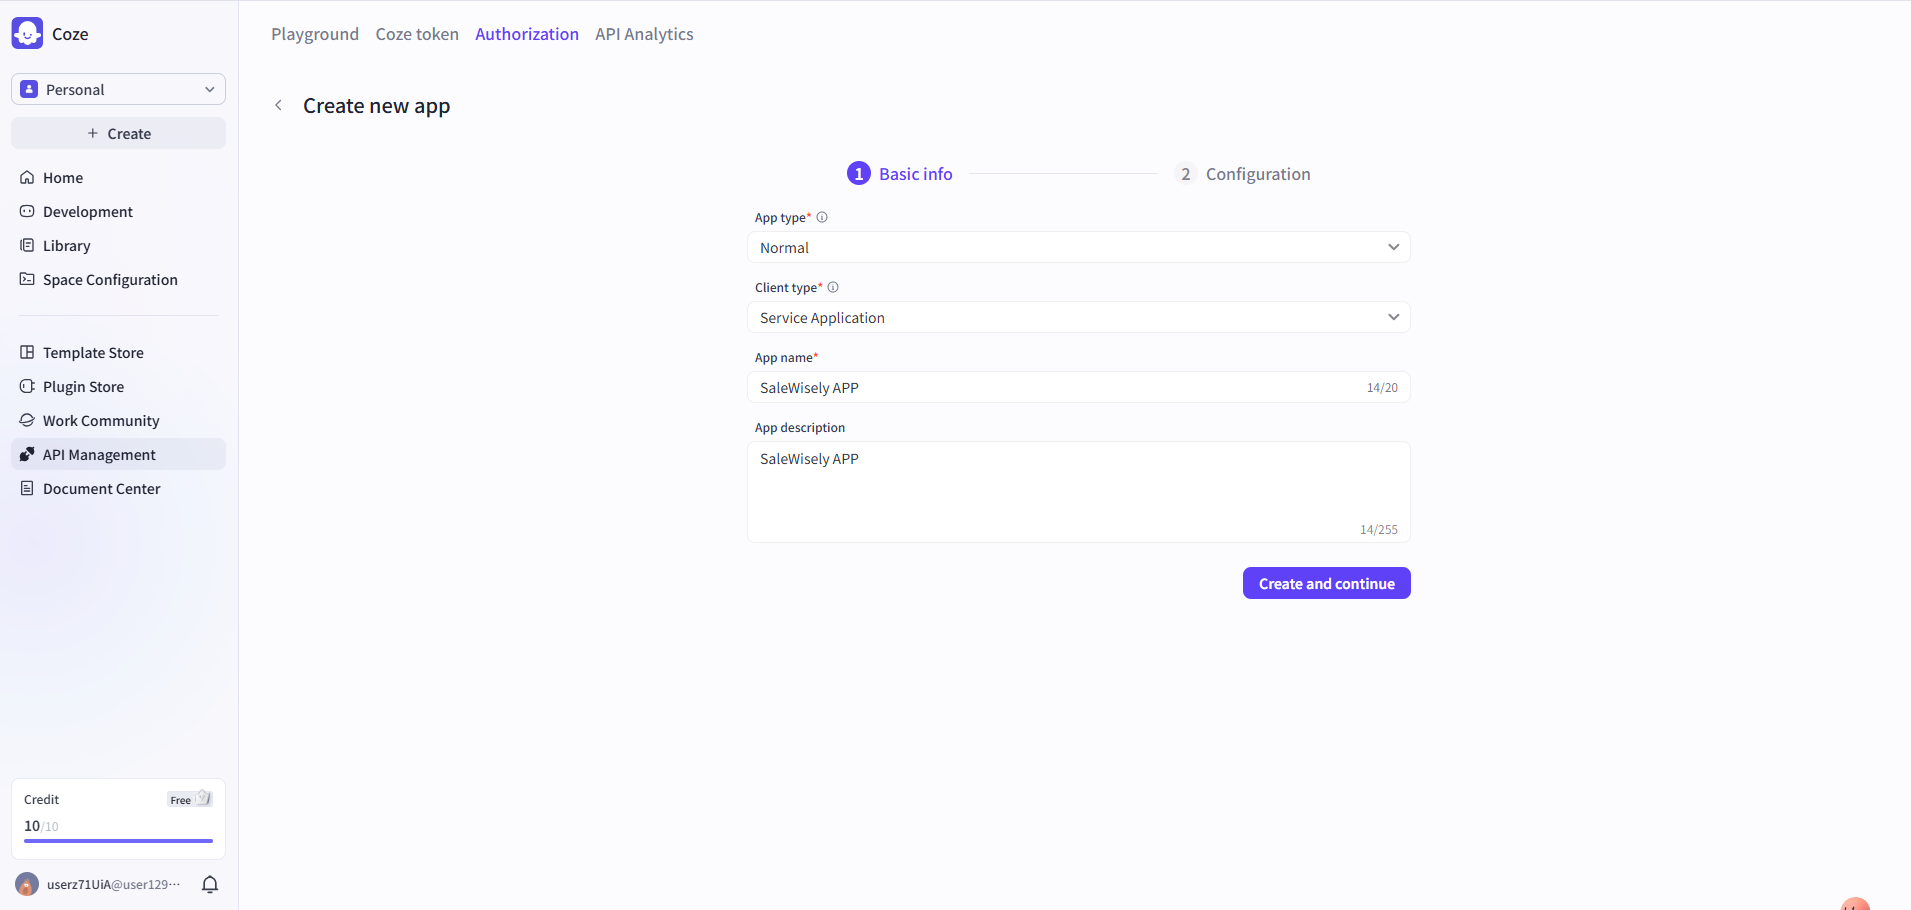
In the left sidebar, open API Management, switch to the top Authorization tab, click Create new app, then fill in:
- App type: select Normal
- Client type: select Service Application (for server-side JWT authentication)
- App name: choose your own; it must be unique
2.3 Get the Public Key and private key (pem)
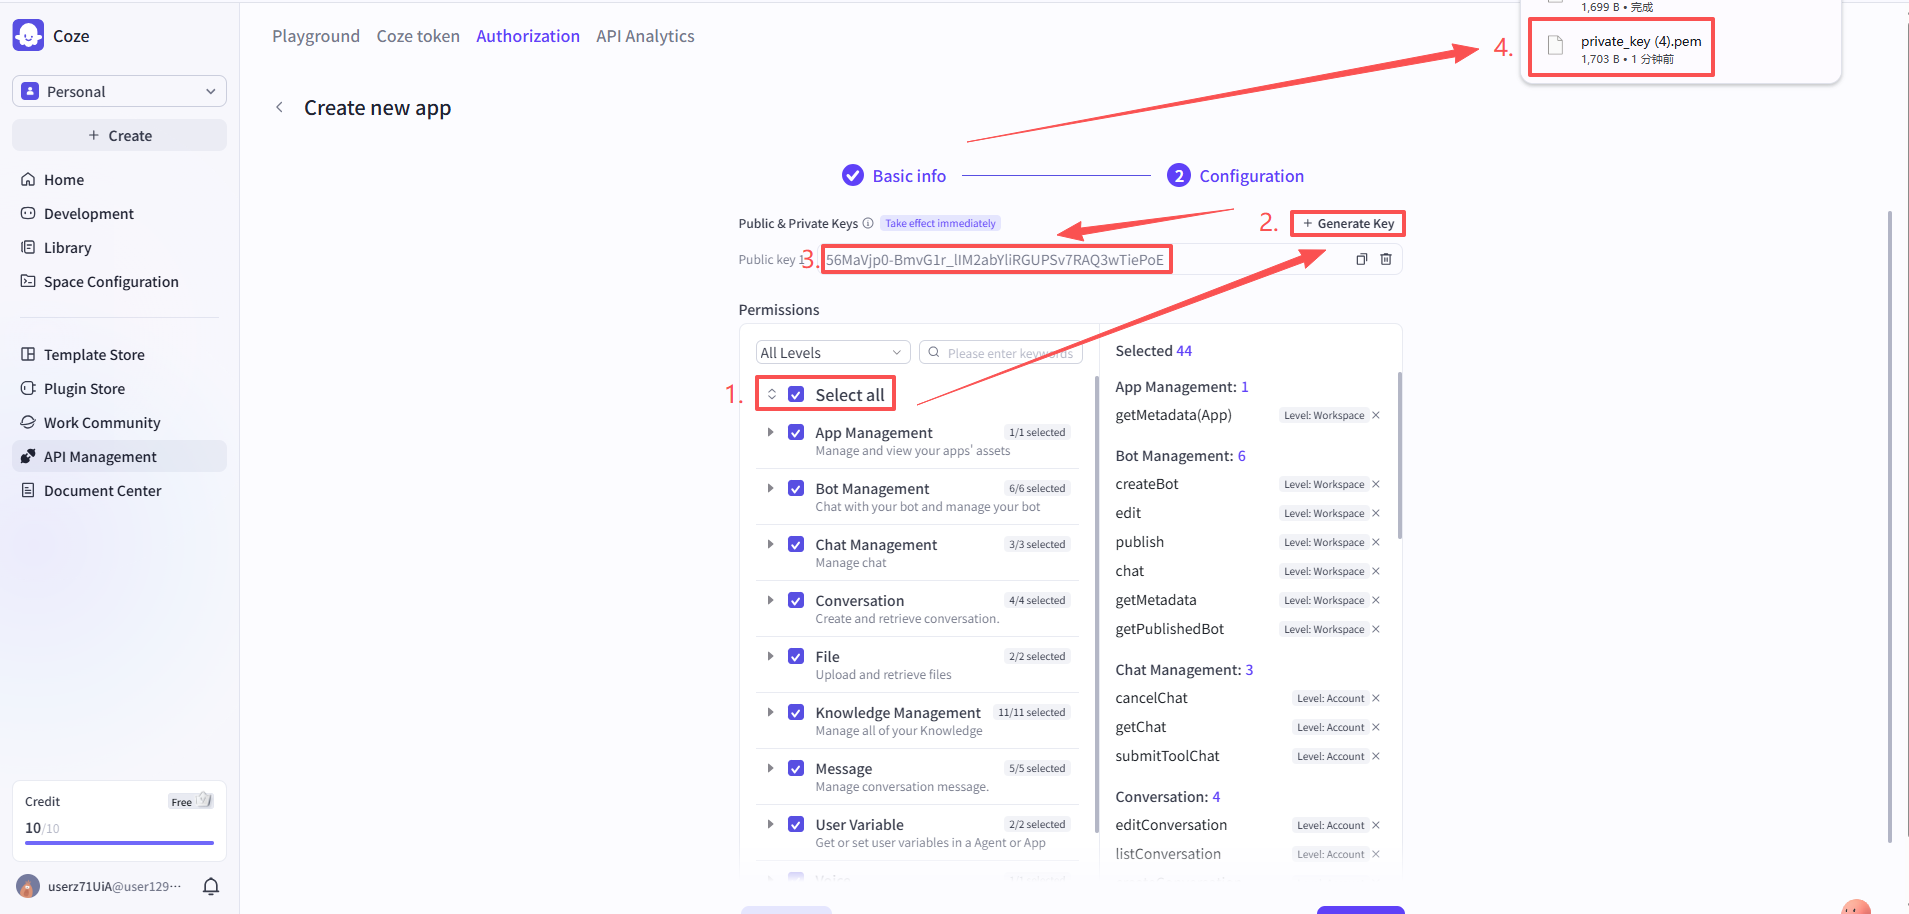
Click Create and continue to reach the Configuration page: (1) under Permissions, tick Select all to grant all permissions; (2) click + Generate Key — the Public key is generated (shown in the input field) and the private_key.pem file is downloaded automatically. Copy and save the Public key, and keep the pem file safe (the private key can only be downloaded once; if lost you must regenerate).
2.4 Install and authorize the app (Authorize)
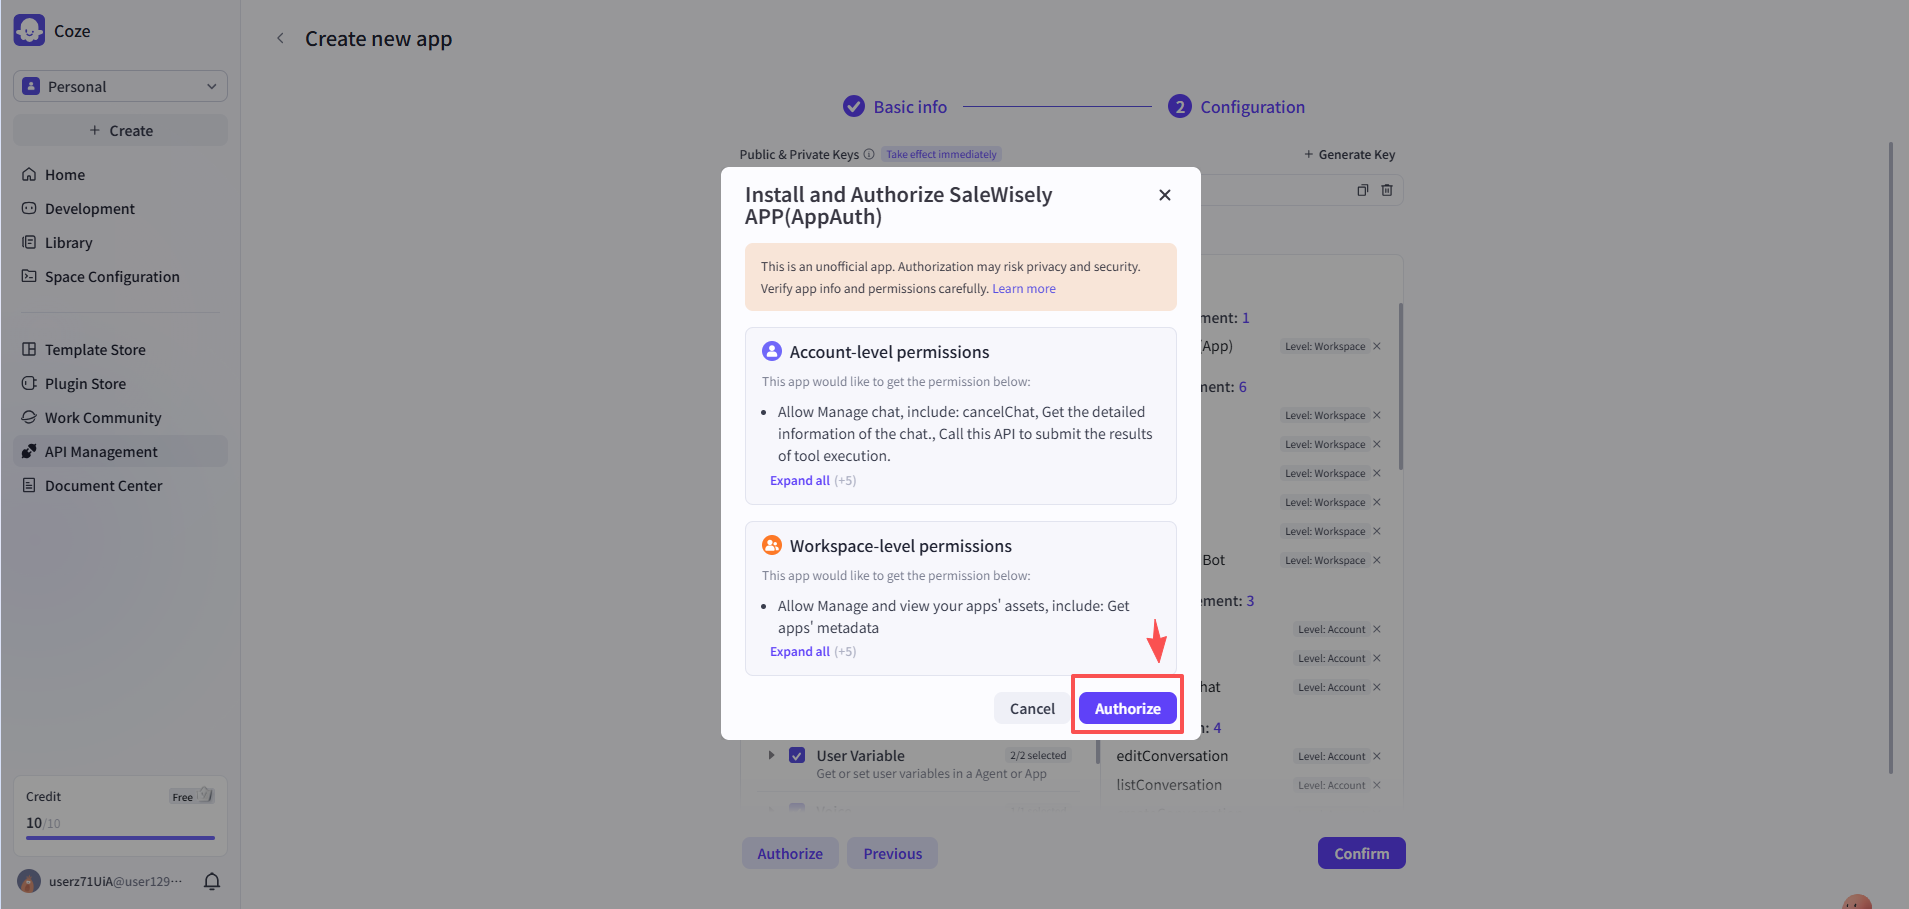
At the bottom of the Configuration page, click Authorize. In the "Install and Authorize … (AppAuth)" dialog, review the Account-level and Workspace-level permissions, then click Authorize in the dialog to grant access, and finally click Confirm to save the app.
2.5 Get the Client ID
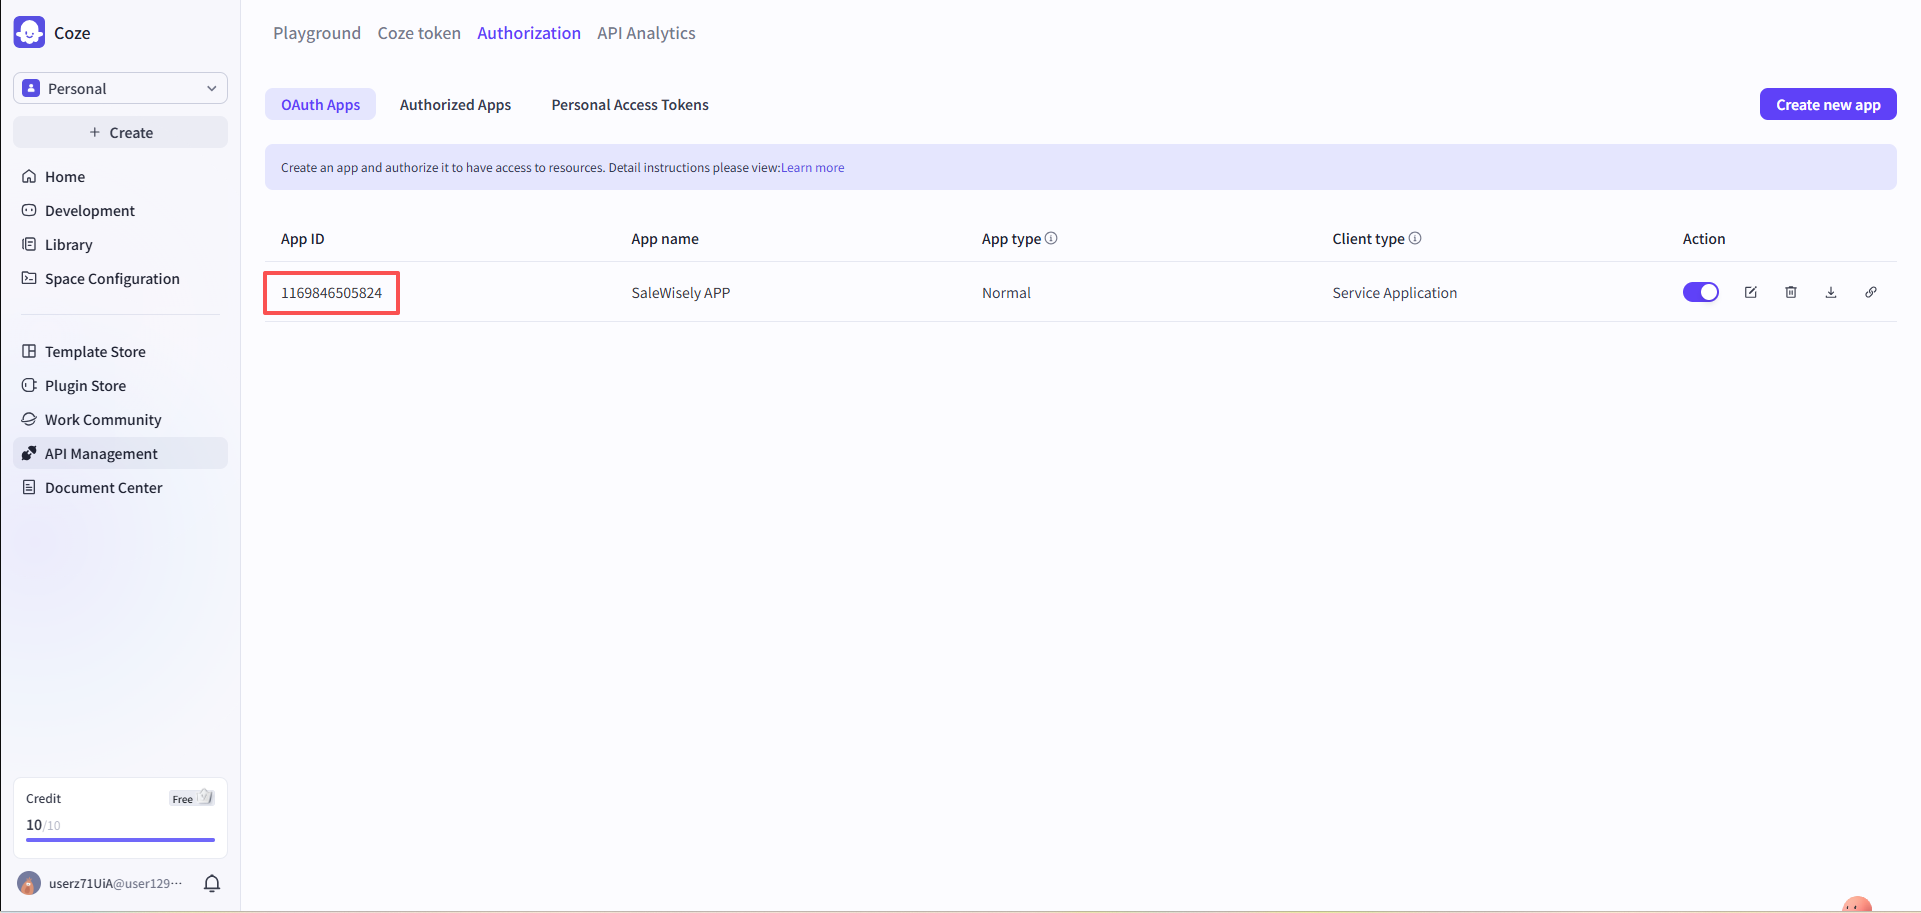
After authorization, go back to Authorization → OAuth Apps; the App ID of that app is the Client ID you will need to fill in later (click to copy).
2.6 Create a bot and publish to API
On coze.com, click Create on the left or open Development, and create a new Agent (bot):
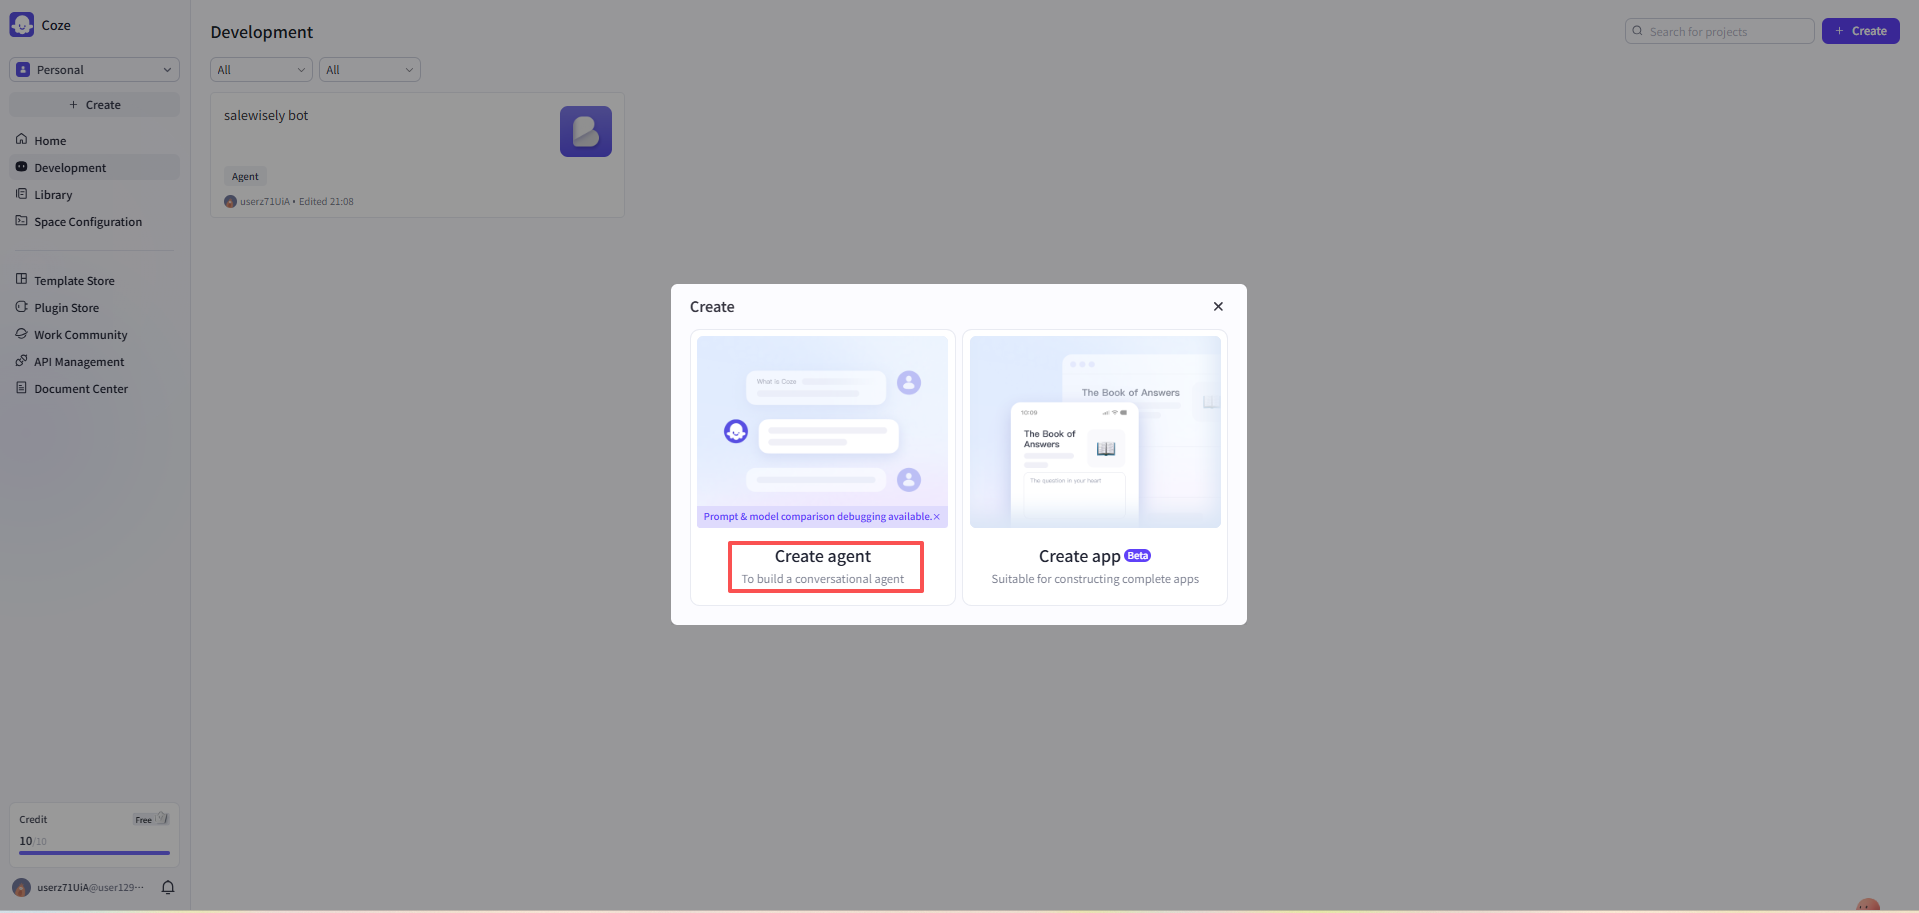
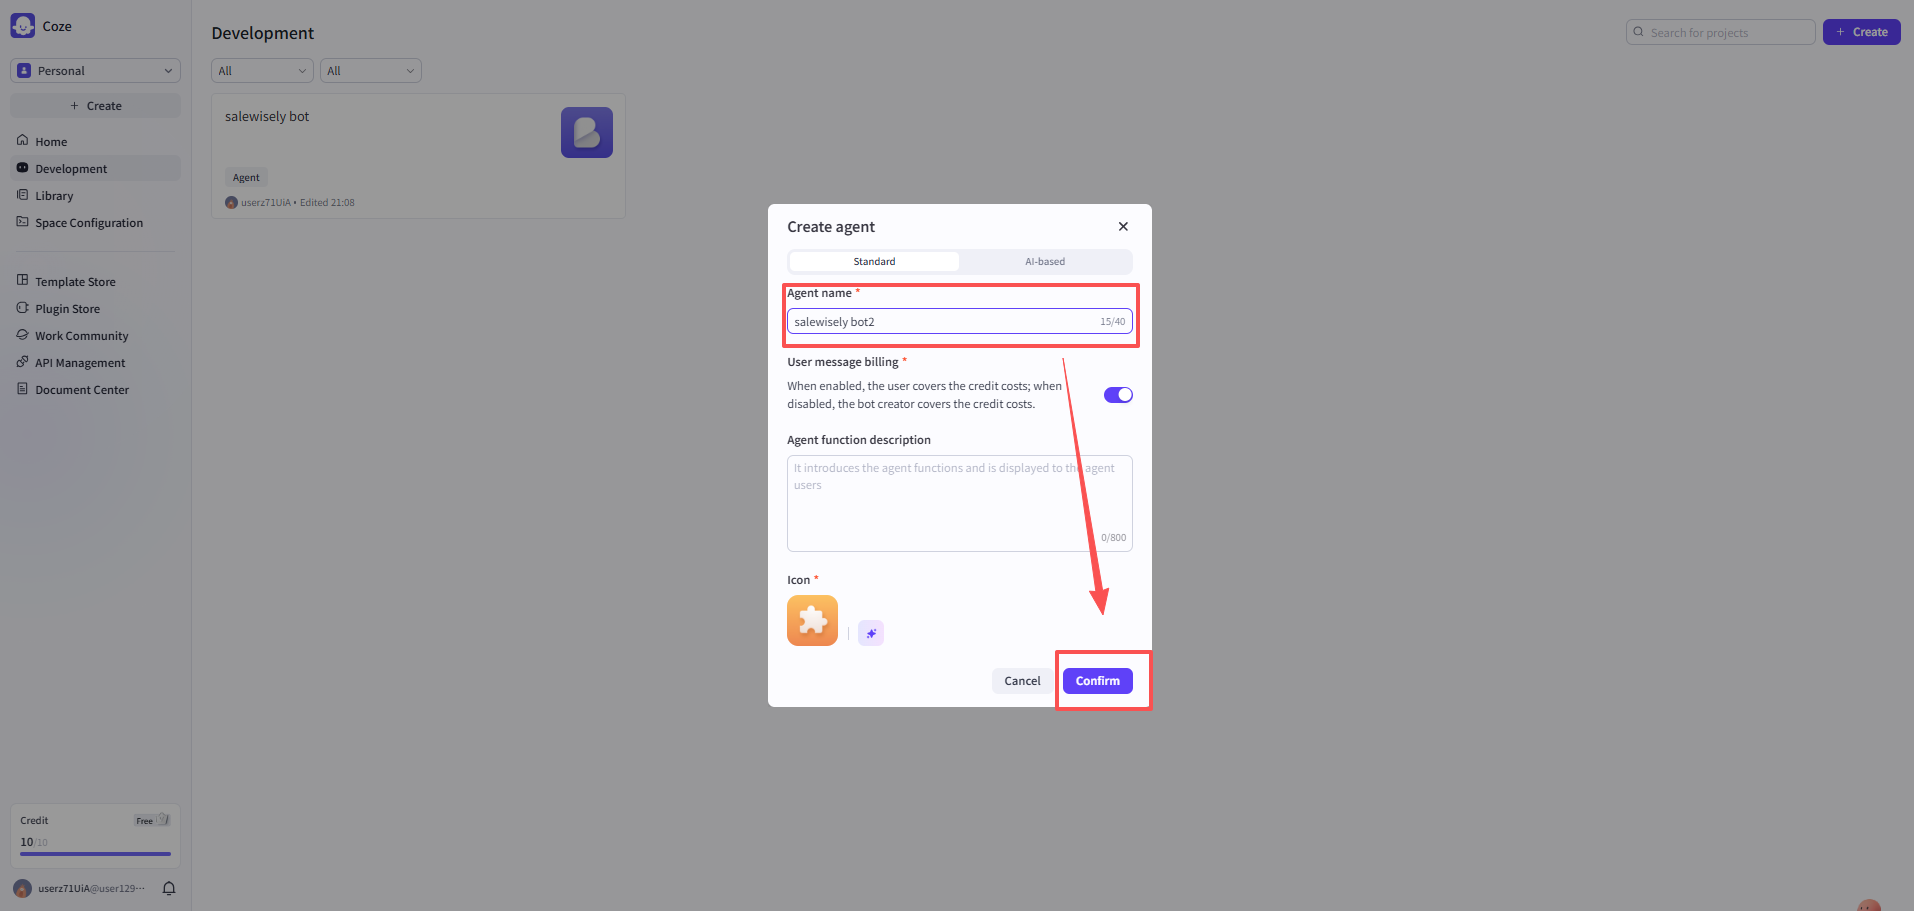
- On the Development page, click + Create in the top-right → choose Create agent → enter the Agent name → click Confirm.
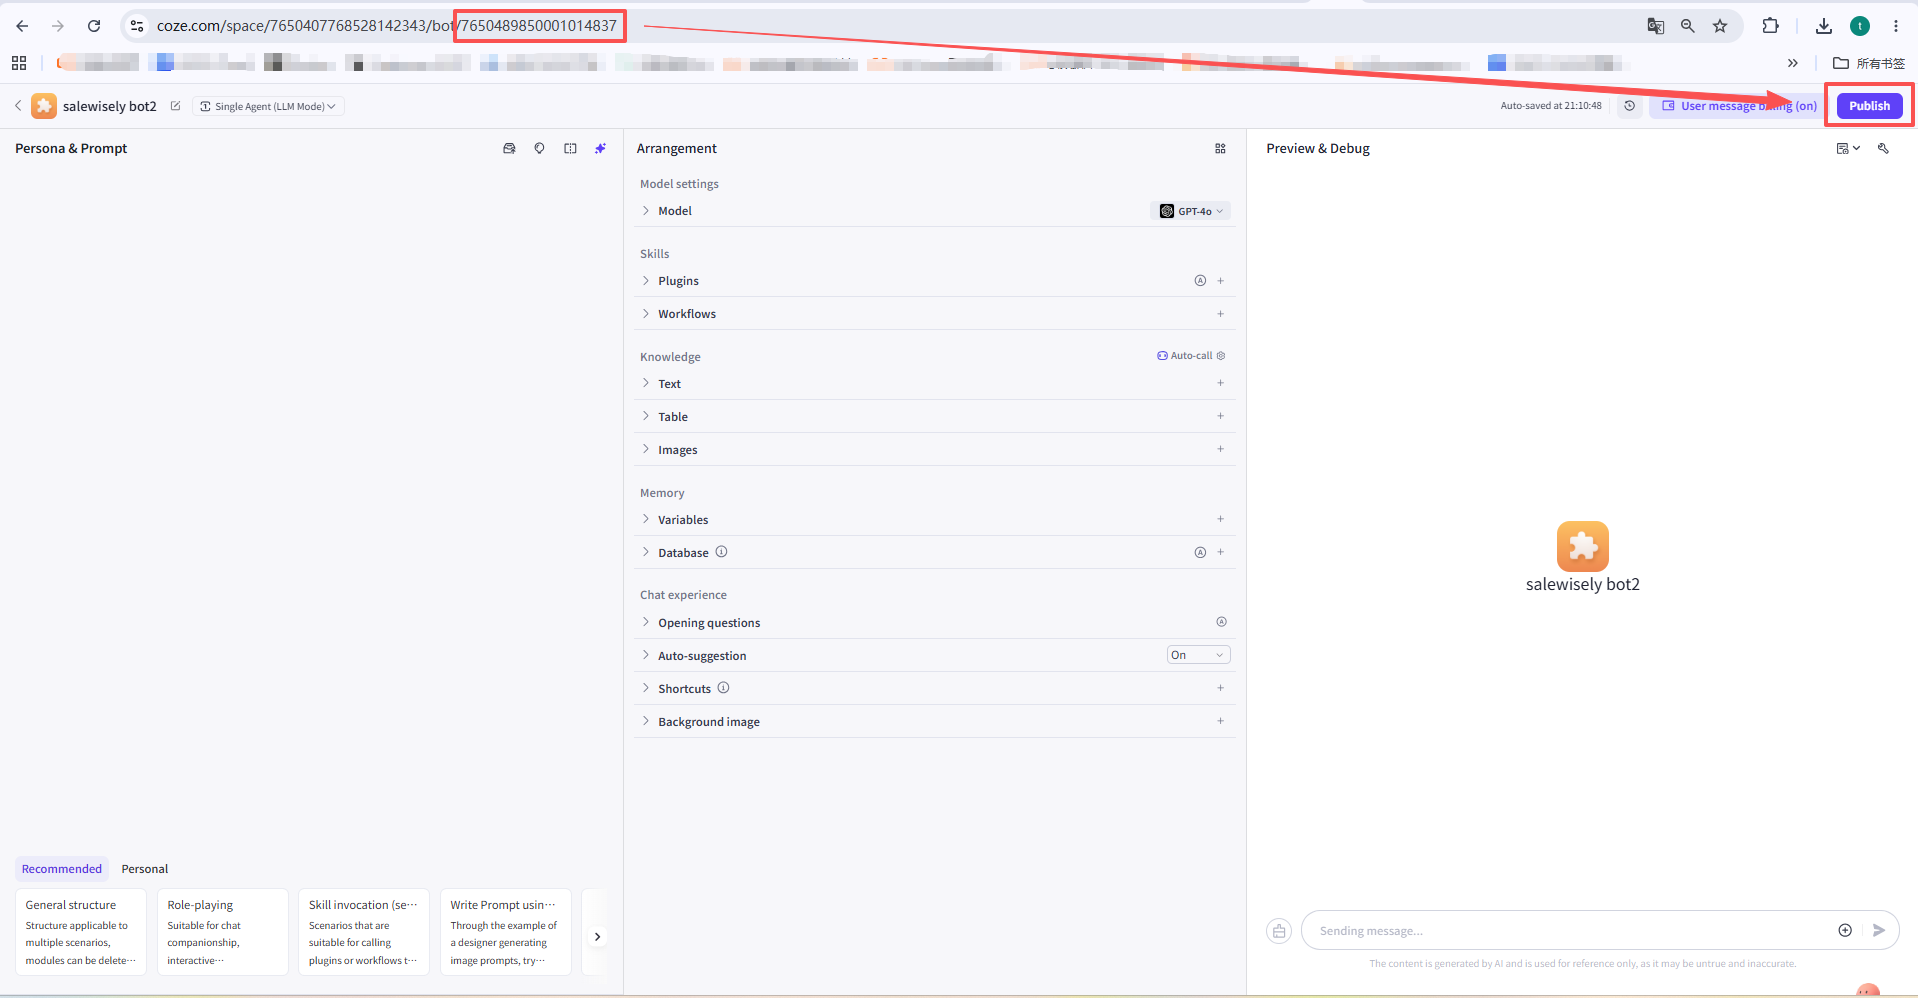
- In the editor, pick a Model (e.g. GPT-4o); add Plugins / Workflows under Skills and Knowledge as needed; debug it in Preview & Debug on the right.
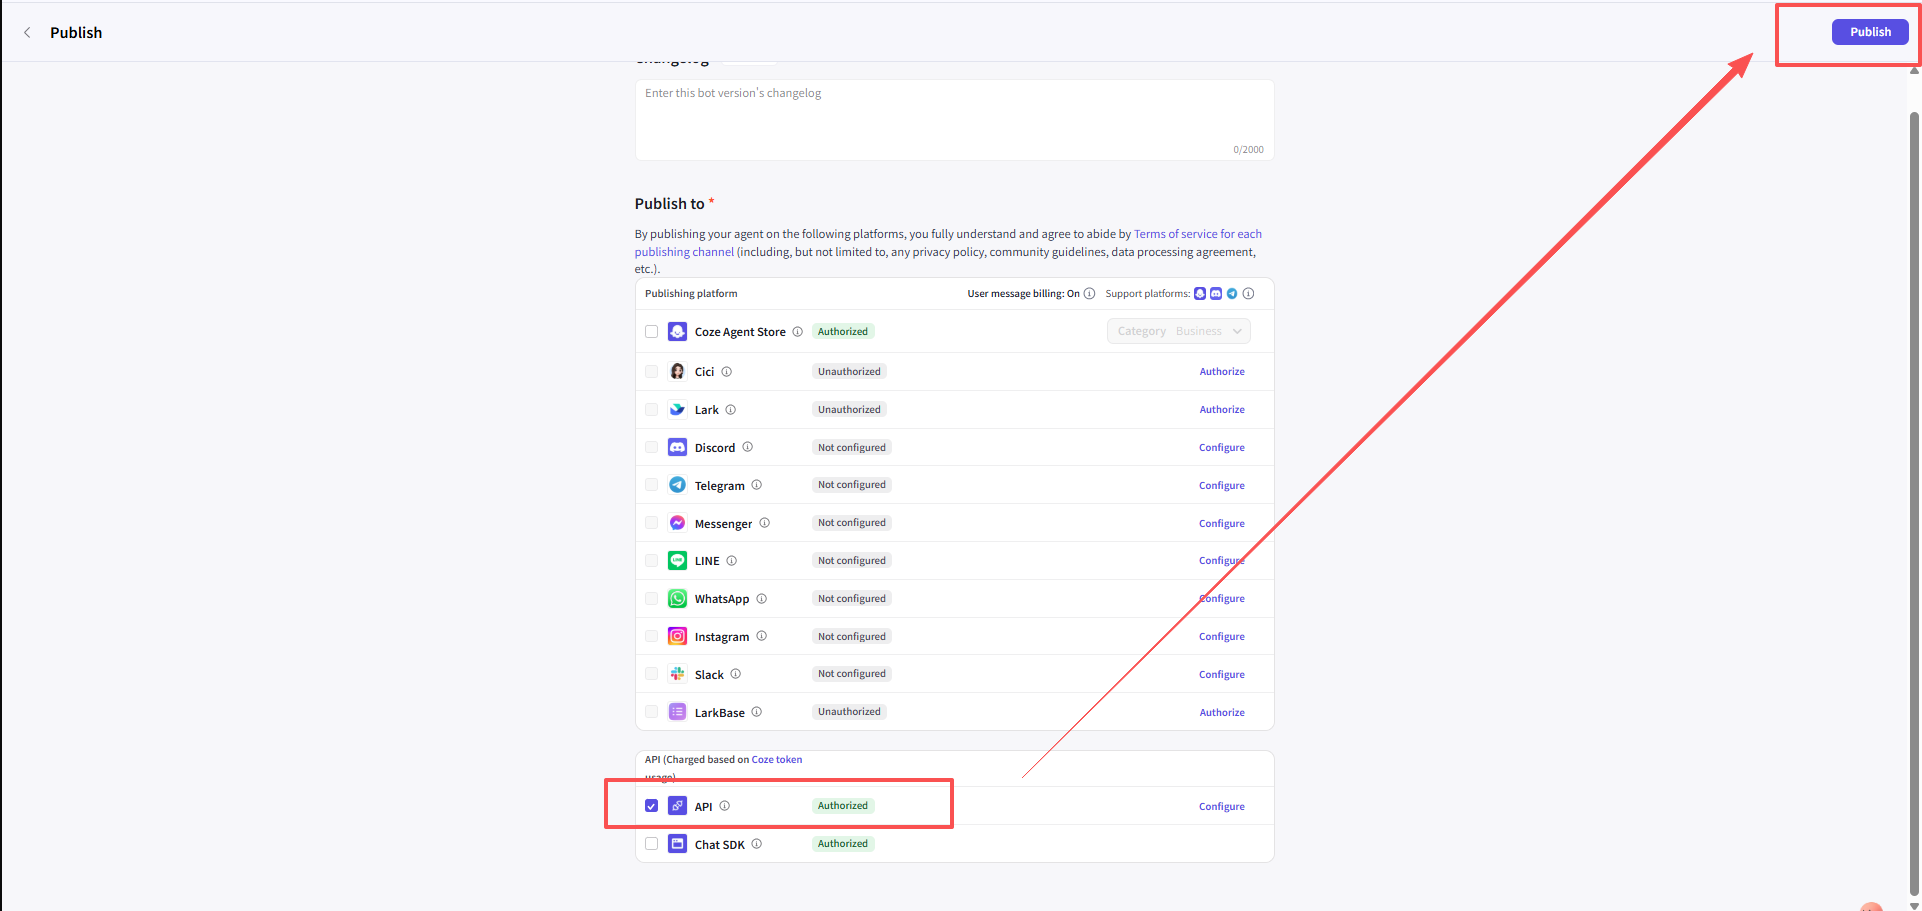
- When it works, click Publish in the top-right; if a "complete a few more steps" dialog appears you can click Skip and publish.
- In the Publish to channel list, be sure to check the API channel at the bottom, then click Publish in the top-right to finish.
2.7 Get the Bot ID
Open the Agent editor; the digits after "bot/" in the browser URL are the Bot ID (e.g. coze.com/space/.../bot/7650489850001014837).
2.8 Fill the details into SaleWisely
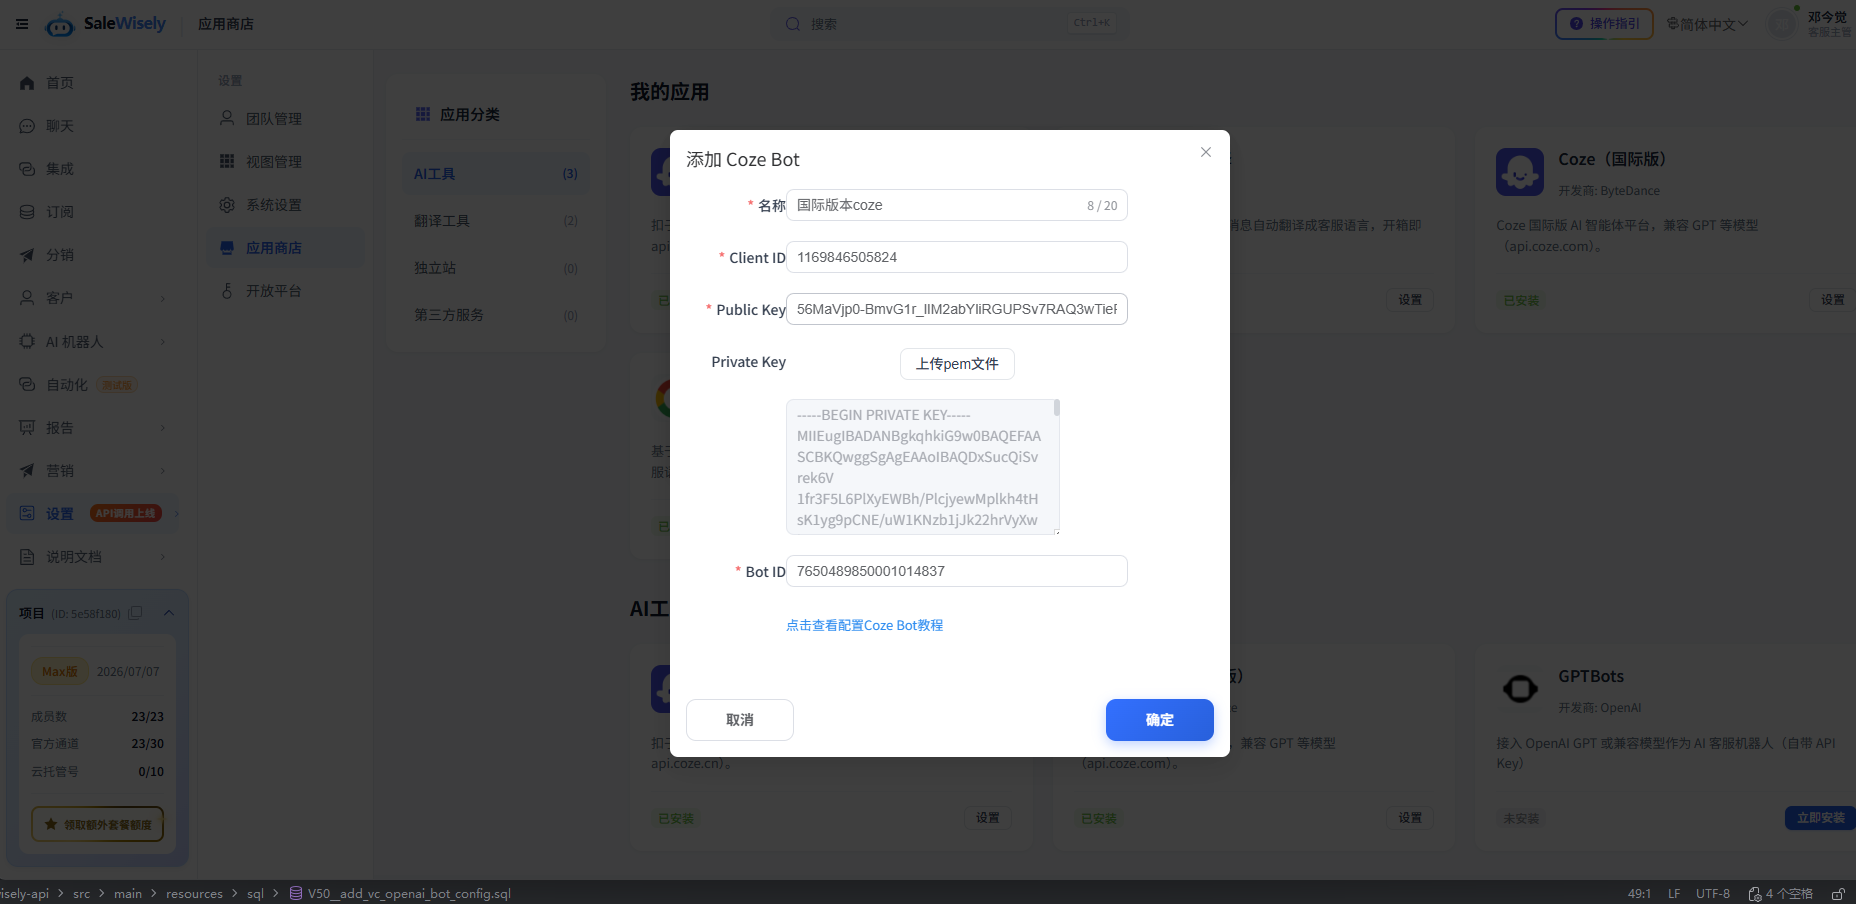
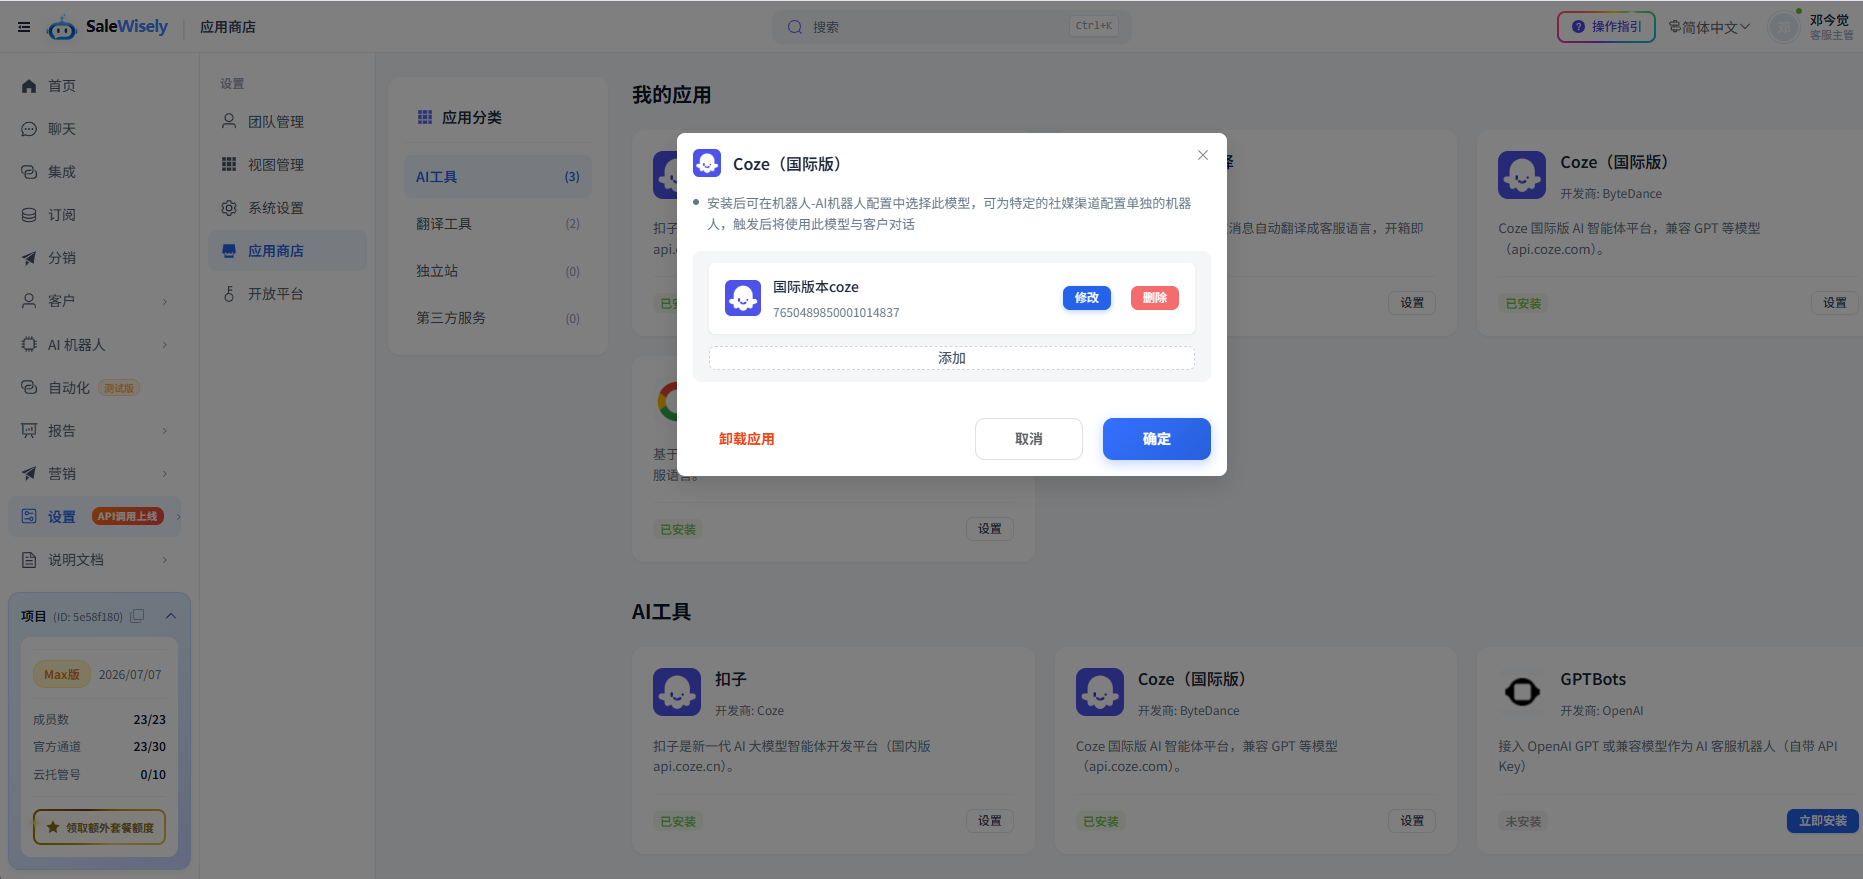
In SaleWisely, go to Settings → App Store → AI Tools → Coze (Global) and click Set up to open the manager, then click Add. In the "Add Coze Bot" dialog, fill in: Name (custom), Client ID, Public Key, Private Key (click "Upload pem file" to upload the pem from step 3) and Bot ID, then click Confirm. The new config then appears in the list; click Confirm to save.
2.9 Use it in a bot
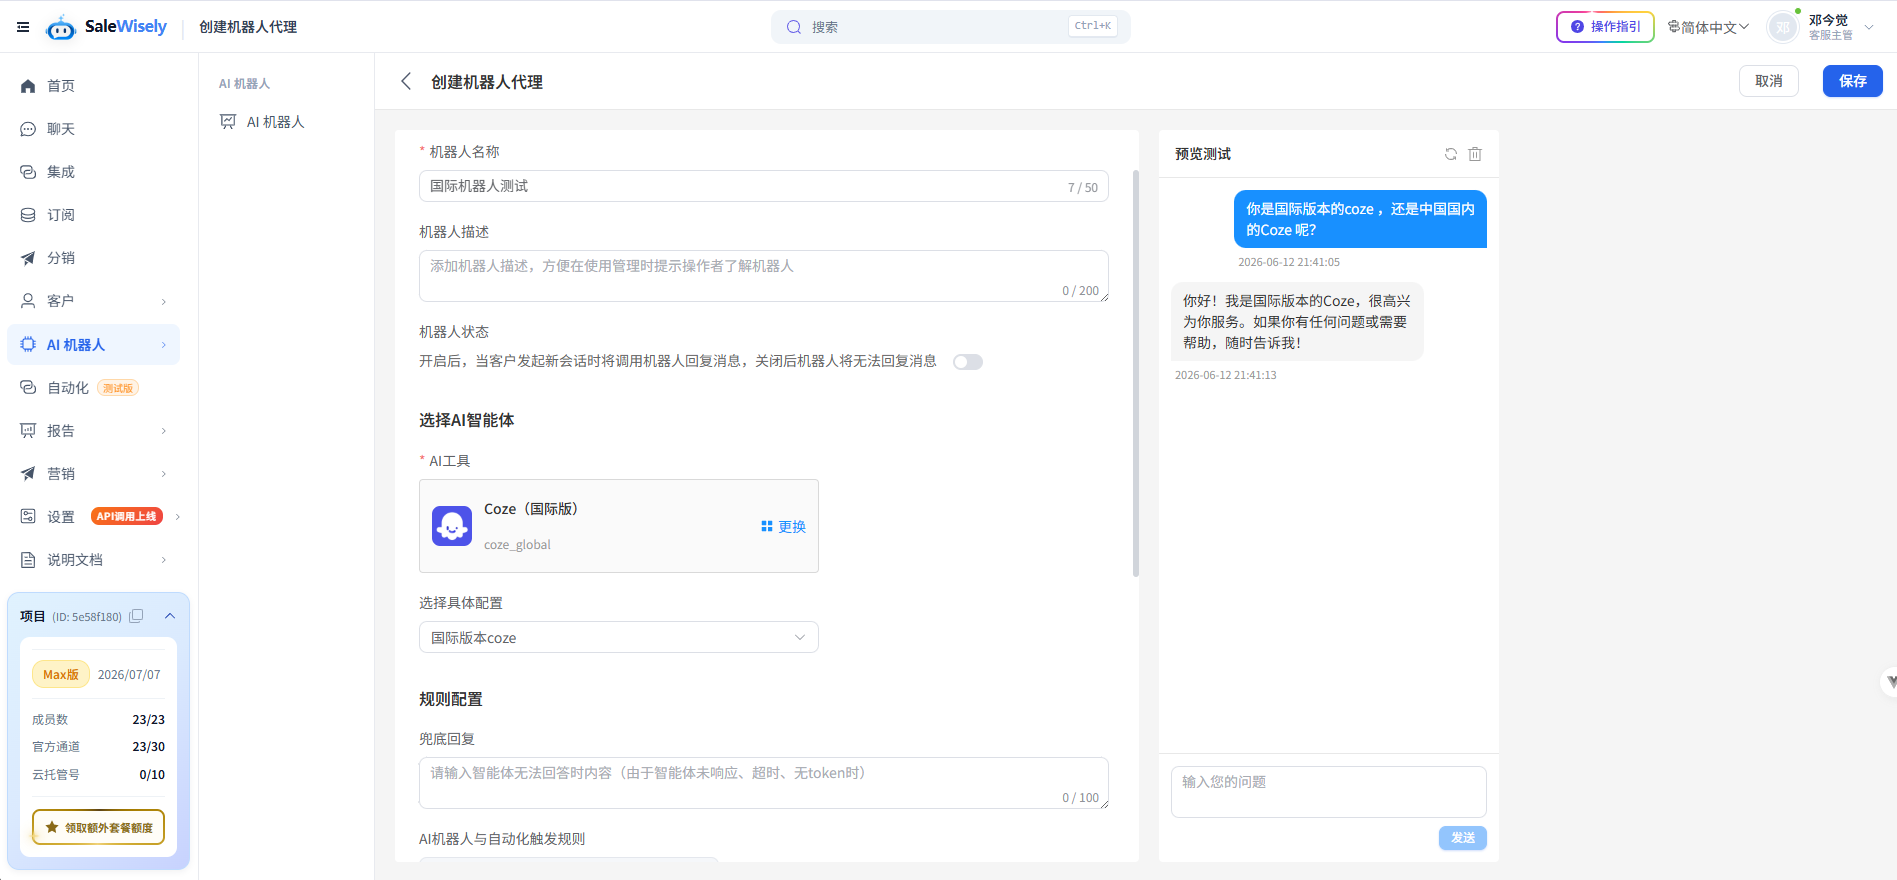
In SaleWisely's AI Bots, create or edit a bot agent: enter the bot name and turn on its status; under Select AI Agent → AI Tool choose Coze (Global), and pick the config you just added (e.g. "coze (Global)") under Select specific config. After saving, you can verify it in the Preview panel on the right, and the bot will auto-reply on your chosen channels.
3. Frequently Asked Questions
Q1: Difference between Coze Global (coze.com) and Coze China (coze.cn)?
Model compatibility: The global version supports large models like GPT-3.5 / GPT-4; the China version mainly uses models such as Yunque.
Account & domain: Global is on coze.com, China is on coze.cn; accounts and credentials (Client ID/keys/Bot) are not interchangeable.
Q2: Connection/operation failed during installation?
Cause: Most often the Bot is not published to API, or the wrong region was used (coze.cn credentials).
Solution: Refer to step 6 to make sure the bot is published to the API channel, and confirm the credentials come from coze.com (Global).